Address: 1A High Street, Blairgowrie, PH10 6ET
Phone: +44 7979 791 955
Testimonial:
Taystful Recipes
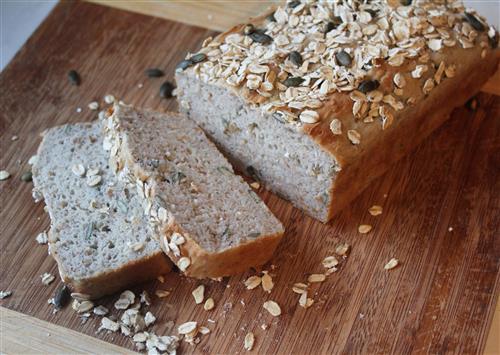
Taystful Gluten Free Seeded Bread
- 5g dried active yeast (or 10g fresh yeast)
- 200g warm water (approx 35C)
- 1 egg white
- 3 tbsp vegetable or sunflower oil
- 1/2 tsp vinegar
- 25g caster sugar
- 3g salt
- 100g gluten free white flour
- 100g gluten free buckwheat flour
- 50g gluten free self raising flour
- 5g xanthan gum
- mixture of seeds approx 20-30g of each (sunflower seeds, pumpkin seeds, linseeds, sesame seeds, poppy seeds)
- Gluten free oats for sprinkling on top
- Oil for brushing on tin
Lightly brush the inside of a 2lb loaf tin with veg or sunflower oil.
Dissolve the yeast in the warm water, whisk in 3 tbsp of the flour, cover with cling film and leave the mixture in a warm place until it starts to froth up (approx 25-28C)
In a bowl whisk together the egg white, half of the oil, vinegar, sugar and salt.
Place the flours, xanthan gum and seeds in to the bowl of a mixer.
Pour in the egg white/oil mix and the frothed yeast.
Switch on the mixer on medium speed with a dough hook, and combine until smooth, add the rest of the oil and mix in.
Place the mix in the loaf tin and level the top. Sprinkle with rolled oats and other seeds if wanted.
Cover with oiled polythene (a freezer bag is fine) and leave in a warm place (approx 23-25C) until well risen (at least 1 hour).
Preheat the oven to 180C.
Bake loaf for approx 20 minutes until golden brown and sounds hollow when tapped on the base. Time and temperature may vary in different ovens.
Take out of tin and cool on a wire rack.

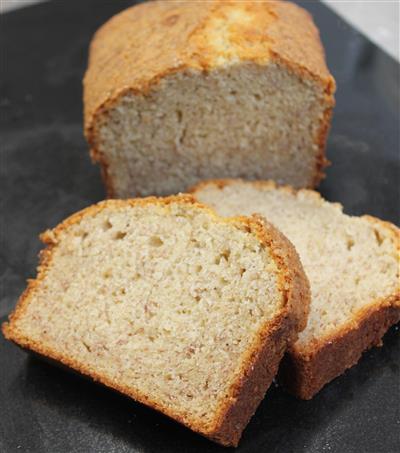
Taystful Banana Loaf - 2 x 2lb loaf tins
- ALLERGENS: EGGS, GLUTEN, MILK. TRACES OF OTHER ALLERGENS POSSIBLE (depending on kitchen and source of ingredients).
- 200g softened butter/margarine (I find a mix of both best)
- 350g caster sugar
- 4 large eggs
- 4 ripe bananas (chopped)
- 450g self raising flour
- 2 tsp. baking powder
- 4 tbsp. milk/water
- Demerara sugar to sprinkle
- Vegetable oil and baking parchment for lining the tins
1) Brush the loaf tins with oil and line with baking parchment. Preheat oven to 160C.
2) Place the butter/marg, sugar, eggs, bananas, SR flour, and baking powder in the bowl of a mixer.
3) Use a beater at medium speed on the machine until ingredients are combined and smooth (only a minute or two).
4) Use a little of the milk or water to bring the mixture to dropping consistency (you may only require a small amount).
5) Place the mix in to the 2 tins, level with the back of a spoon and sprinkle with demerara sugar.
6) Bake for 45-50 minutes at 160C and test – it should spring back at the touch, a skewer should come out clean, ideally use a probe thermometer to check centre of loaf, it should be 85-87C. Every oven is different so keep and eye on your loaves, and adjust time/temperature accordingly. Don’t open the oven door within at least the first 35 minutes of cooking. You can reduce temperature to finish cooking it if outer crumb is darkening and centre is still not ready.
7) Cool for a short while in the tin, and transfer to wire rack.
8) Can be frozen – once cool, wrap well in cling film or freezer bag, and freeze for up to 3 months. From fresh eat within 2 days for best quality.
9) Enjoy making and eating it!
